
OBS Studio: Makes your Video Conferencing / Recording MUCH BETTER!
- Shubhang Kulkarni
- Nov 26, 2020
- 2 min read
In the recent past, the companies that have gained huge popularity are Video-conferencing and online learning platforms (Byjus\’ and WhiteHatJr). And so is the popularity for screen recorders and virtual-cameras. You might\’ve heard of screen recorders and Video-conferencing software, but what\’s a virtual-camera? A camera without hardware? Absolutely not! A virtual-camera is something that can output/stream video wherever you want it to.
Virtual Camera on OBS:
OBS (Open Broadcaster Software) is a widely used open-source streaming/recording software. As the name suggests, it helps you with streaming/recording content from you PC.
Image Courtesy: Elegant Themes
How to use it? Here\’s a mini-guide on how it can be useful to you
If you\’ve got to configure your video, i.e, crop out, adjust the lighting (through software though: Brightness) and all other kinds of configurations, here\’s how you\’ve to do it.
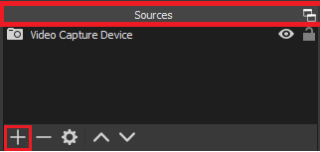
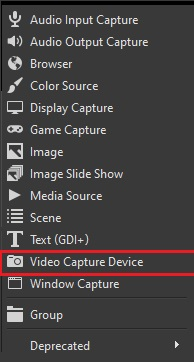
In the \”Sources\” Window in the bottom left, click on the \”+\” and then add a Video Capture device. Just keep all the settings at default while adding it. That\’s it! You\’re done adding your video to the scene.
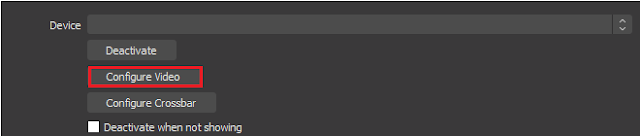
Now, to configure your video, double click on the Video Capture tab under Sources and then configure video.
If you want to record your screen, with other sources too (Like text or your own webcam), here\’s how yo do it:
In the Sources Window, this time, add Display Capture, to cover the whole screen and Window Capture to capture a specific Window only.
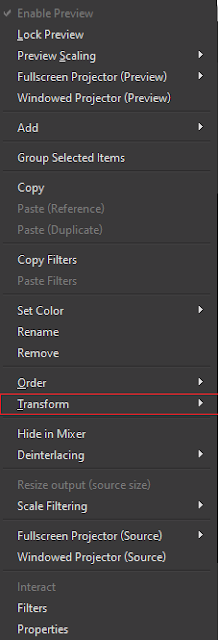
Adjust the amount of area each source consumes by dragging the borders of the scene to crop it or using the \”Transform\” feature by right clicking on the required source.
The next step is to add more of such sources to your scene, be it \”Text\” , \”Picture\”, or your own webcam (\”Video Capture\”). Adjust the size of each source the same way you did to the \”Window Capture\” earlier.
Next up, how do you stream all of this to your video-conference?
For this you\’ll need an OBS Add-on/Plugin, that outputs everything on your \”Scene Window\”, OBS-VirtualCam. Download it from here (Don\’t forget to check the version-match. This one for OBS v24.0.0 and this one for OBS v25. Also, DO NOT forget to read the NOTE in each one of those download links.)
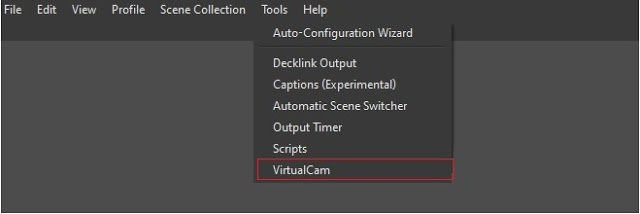
Once you\’re done downloading the Add-On/Plugin, in the OBS Menu Bar, you\’ll find it in the tools sections. Turn the Virtual-Cam ON (i.e click on \”START\”)

Next and the final step is to select OBS Camera as the video-input on whatever video conferencing software you\’re using. Click here to know how to do that.
This was it for the blog. Hope you liked it 🙂
And also, let me know if you want more of this kind of blogs (based on improving Video-conferencing experience) in the comments 🙂
If you couldn\’t execute any of the above mentioned steps, feel free to comment regarding the same too. Will try to resolve it ASAP.


Comments